Eco-friendly and made in Canada
Tempo diploma frames are made in Canada using sustainable materials under fair labour conditions.
- We purchase all the raw lumber used to make Tempo moldings from North American suppliers who comply with all federal, state and local harvesting guidelines.
- Most Tempo moldings are made from North American poplar, a very sustainable wood.
- Tempo uses only water-based stains and paints that are free of heavy metals or lead.
- Recyclable Tempo mats are made from recycled paper pulp, natural starch adhesives and EPA-approved pigments and dyes.
- All corrugated packaging used to ship Tempo frames is made from recycled paper and can be disposed of through local blue box programs.
- Tempo frames are manufactured from start to finish in Pickering, Ontario, and Tempo Framing Systems is a member in good standing of the Fair Labor Association (Member ID: 2128).
- Easy Diploma Framing
- There is no need to send us your document: you can easily insert it into the quick-loading frame. There are no screws, wires or complicated assemblies.
- Order matching frames
If you have other documents (awards, certificates, etc.) for which you would like matching frames, contact us for further information.
Assembly Guide
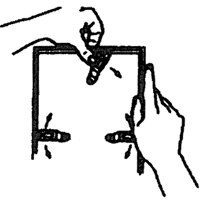
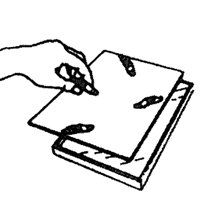
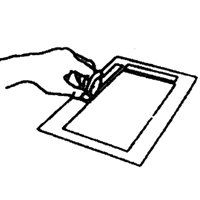
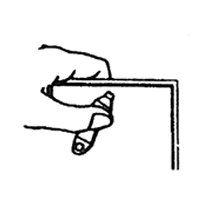
Expose the adhesive on the back of the mat by removing the protective strips. Center the mat right side up over the image to be framed and gently press down along adhesive strips to secure image.Press down and rotate clips to release them from the frame.
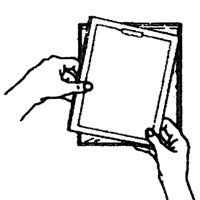
Turn the matted image over and further anchor the image in place with a piece of tape. Insert the matted image into the frame.